

Creating a New project:
To Download the project click on Download button:

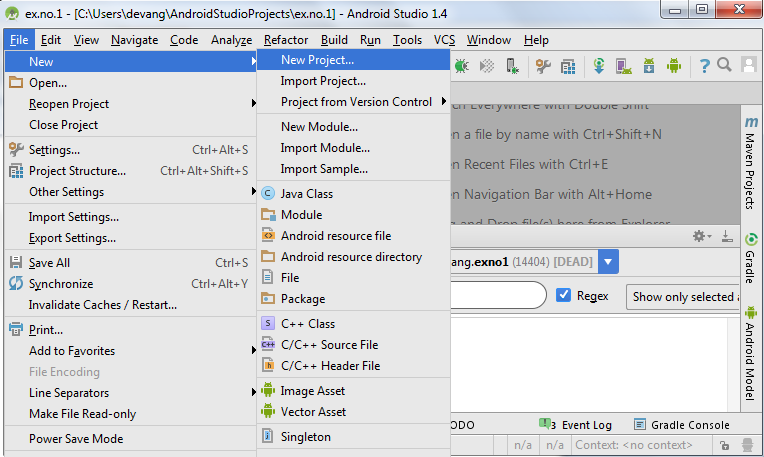
- Open Android Studio and then click on File -> New -> New project.
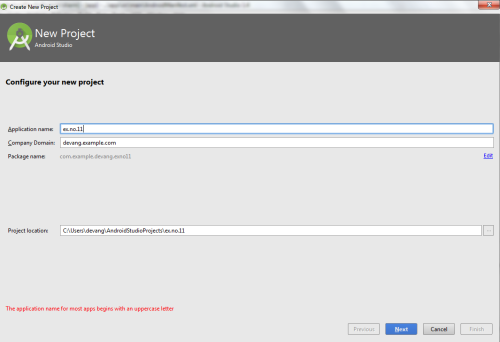
- Then type the Application name as “ex.no.11″ and click Next.
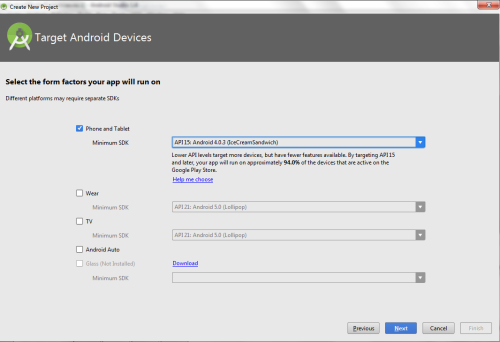
- Then select the Minimum SDK as shown below and click Next.
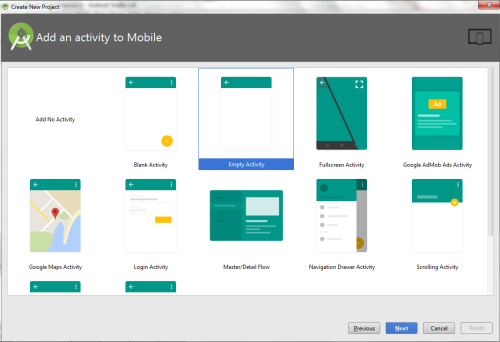
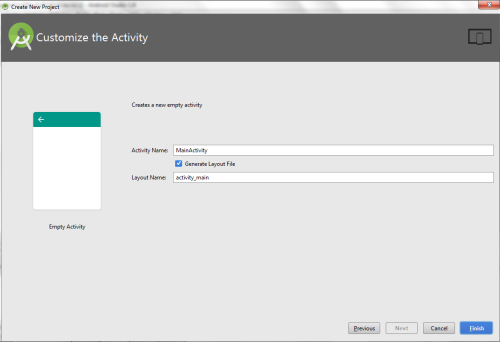
- Then select the Empty Activity and click Next.
- Finally click Finish.
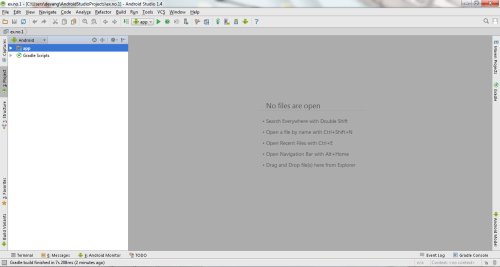
- It will take some time to build and load the project.
- After completion it will look as given below.
Creating Second Activity for the Android Application:
- Click on File -> New -> Activity -> Empty Activity.
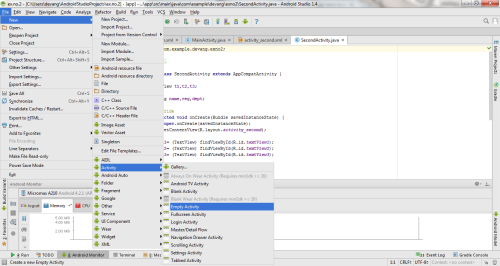
- Type the Activity Name as AlarmReceiver and click Finish button.

- Thus Second Activity For the application is created.
Designing layout for the Android Application:
- Click on app -> res -> layout -> activity_main.xml.
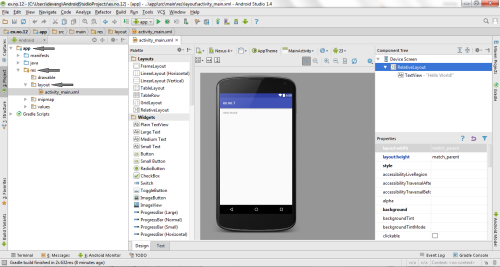
- Now click on Text as shown below.
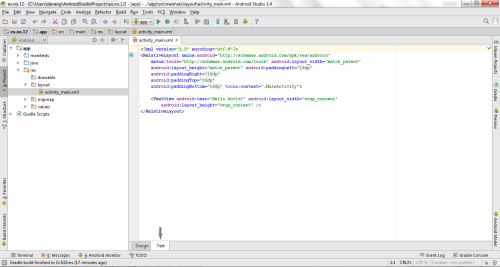
- Then delete the code which is there and type the code as given below
1
2
3
4
5
6
7
8
9
10
11
12
13
14
15
16
17
18
19
20
21
22
| <?xml version="1.0" encoding="utf-8"?><LinearLayout xmlns:android="http://schemas.android.com/apk/res/android" android:layout_width="match_parent" android:layout_height="match_parent" android:orientation="vertical"> <TimePicker android:id="@+id/timePicker" android:layout_width="wrap_content" android:layout_height="wrap_content" android:layout_gravity="center" /> <ToggleButton android:id="@+id/toggleButton" android:layout_width="wrap_content" android:layout_height="wrap_content" android:layout_gravity="center" android:layout_margin="20dp" android:checked="false" android:onClick="OnToggleClicked" /></LinearLayout> |
- Now click on Design and your application will look as given below.

- So now the designing part is completed.
Changes in Manifest for the Android Application:
- Click on app -> manifests -> AndroidManifest.xml
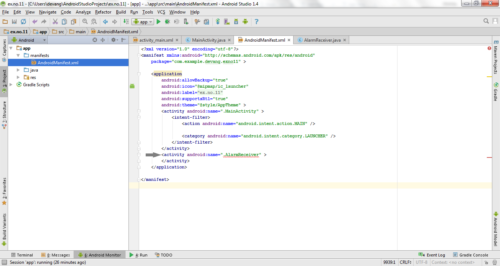
- Now change the activity tag to receiver tag in the AndroidManifest.xml file as shown below

Code for AndroidManifest.xml:
1
2
3
4
5
6
7
8
9
10
11
12
13
14
15
16
17
18
19
20
21
22
| <?xml version="1.0" encoding="utf-8"?><manifest xmlns:android="http://schemas.android.com/apk/res/android" package="com.example.exno11" > <application android:allowBackup="true" android:icon="@mipmap/ic_launcher" android:label="@string/app_name" android:supportsRtl="true" android:theme="@style/AppTheme" > <activity android:name=".MainActivity" > <intent-filter> <action android:name="android.intent.action.MAIN" /> <category android:name="android.intent.category.LAUNCHER" /> </intent-filter> </activity> <receiver android:name=".AlarmReceiver" > </receiver> </application></manifest> |
- So now the changes are done in the Manifest.
Java Coding for the Android Application:
Java Coding for Main Activity:
- Click on app -> java -> com.example.exno11 -> MainActivity.

- Then delete the code which is there and type the code as given below.
- Code for MainActivity.java:
1
2
3
4
5
6
7
8
9
10
11
12
13
14
15
16
17
18
19
20
21
22
23
24
25
26
27
28
29
30
31
32
33
34
35
36
37
38
39
40
41
42
43
44
45
46
47
48
49
50
51
52
53
54
55
56
57
| package com.example.exno11;import android.app.AlarmManager;import android.app.PendingIntent;import android.content.Intent;import android.os.Bundle;import android.support.v7.app.AppCompatActivity;import android.view.View;import android.widget.TimePicker;import android.widget.Toast;import android.widget.ToggleButton;import java.util.Calendar;public class MainActivity extends AppCompatActivity{ TimePicker alarmTimePicker; PendingIntent pendingIntent; AlarmManager alarmManager; @Override protected void onCreate(Bundle savedInstanceState) { super.onCreate(savedInstanceState); setContentView(R.layout.activity_main); alarmTimePicker = (TimePicker) findViewById(R.id.timePicker); alarmManager = (AlarmManager) getSystemService(ALARM_SERVICE); } public void OnToggleClicked(View view) { long time; if (((ToggleButton) view).isChecked()) { Toast.makeText(MainActivity.this, "ALARM ON", Toast.LENGTH_SHORT).show(); Calendar calendar = Calendar.getInstance(); calendar.set(Calendar.HOUR_OF_DAY, alarmTimePicker.getCurrentHour()); calendar.set(Calendar.MINUTE, alarmTimePicker.getCurrentMinute()); Intent intent = new Intent(this, AlarmReceiver.class); pendingIntent = PendingIntent.getBroadcast(this, 0, intent, 0); time=(calendar.getTimeInMillis()-(calendar.getTimeInMillis()%60000)); if(System.currentTimeMillis()>time) { if (calendar.AM_PM == 0) time = time + (1000*60*60*12); else time = time + (1000*60*60*24); } alarmManager.setRepeating(AlarmManager.RTC_WAKEUP, time, 10000, pendingIntent); } else { alarmManager.cancel(pendingIntent); Toast.makeText(MainActivity.this, "ALARM OFF", Toast.LENGTH_SHORT).show(); } }} |
- So now the Coding part of Main Activity is completed.
Java Coding for Alarm Receiver:
- Click on app -> java -> com.example.exno11 -> AlarmReceiver.

- Then delete the code which is there and type the code as given below.
Code for AlarmReceiver.java:
1
2
3
4
5
6
7
8
9
10
11
12
13
14
15
16
17
18
19
20
21
22
23
24
25
| package com.example.exno11;import android.content.BroadcastReceiver;import android.content.Context;import android.content.Intent;import android.media.Ringtone;import android.media.RingtoneManager;import android.net.Uri;import android.widget.Toast;public class AlarmReceiver extends BroadcastReceiver { @Override public void onReceive(Context context, Intent intent) { Toast.makeText(context, "Alarm! Wake up! Wake up!", Toast.LENGTH_LONG).show(); Uri alarmUri = RingtoneManager.getDefaultUri(RingtoneManager.TYPE_ALARM); if (alarmUri == null) { alarmUri = RingtoneManager.getDefaultUri(RingtoneManager.TYPE_NOTIFICATION); } Ringtone ringtone = RingtoneManager.getRingtone(context, alarmUri); ringtone.play(); }} |
- So now the Coding part of Alarm Receiver is also completed.
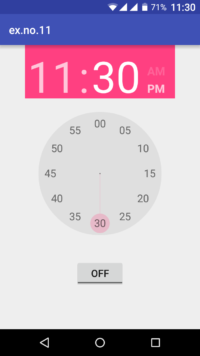
- Now run the application to see the output.
Output:
Result:
Thus Android Application that creates Alarm Clock is developed and executed successfully.
